Getting Started with NFC
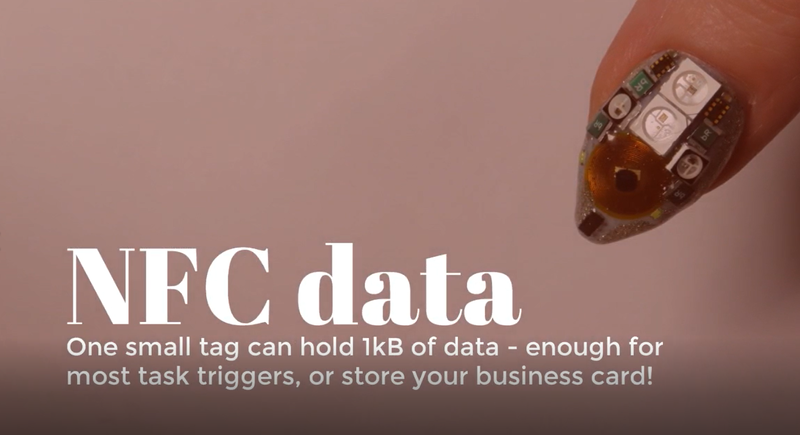
Having technology you can carry with you is nothing new, we have watches, smartwatches, smartphones, and a plethora of fitness devices, but as a gentle introduction to body hacking, how about smart nails?

NFC stands for Near Field Communication, and is a way to transmit power and data wirelessly over a short range using tiny coils of wire as antennae. It's what's inside your contactless credit or debit card, Oyster card, and what your phone uses for Android or Apple Pay.
By far the easiest way to read and write NFC tags is with your phone, if it has NFC capabilities. There are a number of apps available but, for this one, we'll use "NFC Tools". If you're an iPhone user (they have NFC, but it's currently only used by Apple Pay), you'll have to go down the code-it-yourself route and skip on in this tutorial to the "Using the Adafruit PN532 with a Raspberry Pi" section. You'll still be able to trigger the LED nail stickers on contactless card readers, and other devices such as Oyster card readers.
Using NFC Tools on an Android phone

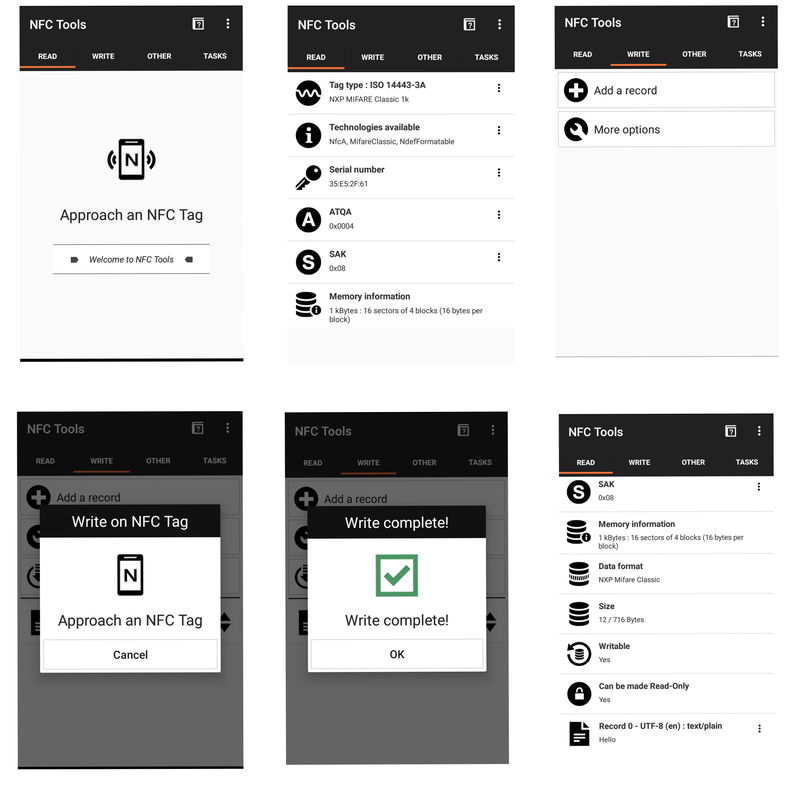
- When you open the app you should see a screen that says "Approach an NFC tag". Hold your phone over the tag, and you'll get something similar to the second screen above.
- This screen gives you information about your tag, such as the type, serial number, and memory size.
- If you go to the "WRITE" tab, you'll get an option to "Add a record". We chose to add text, entered the word "hello", and then tapped "Write".
- The app will tell you when you need to approach your tag to write to it.
- When the write is complete, you'll get a clear message if it was successful.
- When you read the tag again, you should be able to see the record you added.
There are many other things you can use the tags for, such as triggering a URL to open, texting someone (e.g. "I'm on my way home!"). Go wild!
Using the Adafruit PN532 with a Raspberry Pi
The Adafruit PN532 is an NFC breakout that can be used with Arduino or with Raspberry Pi to read and write NFC tags or devices. We'll be using it with Raspberry Pi and Python.
First, you should go to the Adafruit repository for the Python version of the software, and follow their instructions to install the library. The Adafruit code uses a slightly different setup, so you'll have to change some of the pin numbers in the code.
In every file, you'll find the pins defined at the top, and you'll need to change these ones to match the numbers below:
# configuration for a Raspberry Pi
CS = 8
MOSI = 10
MISO = 9
SCLK = 11
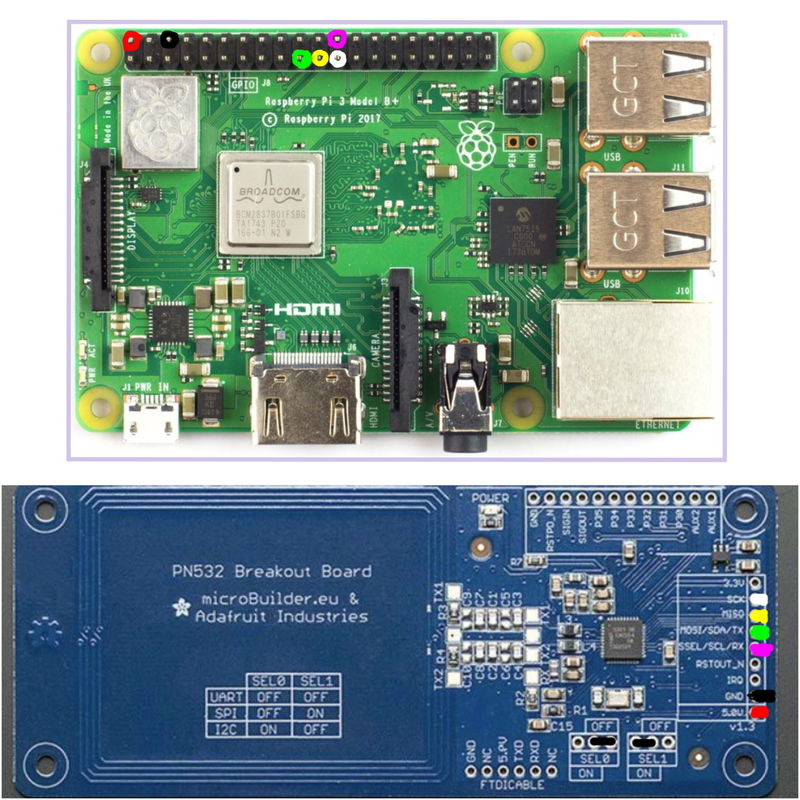
Once you've changed the code, you'll need to connect the Adafruit board to your Raspberry Pi as shown in the following diagram. We used female-to-female jumper jerky.

For reference:
| Adafruit PN532 | Raspberry Pi (BCM numbering) | Colour in diagram |
|---|---|---|
| SCK | 11 | white |
| MISO | 9 | yellow |
| MOSI/SDA/TX | 10 | green |
| SSEL/SCL/RX | 8 | pink |
| GND | GND/ - | black |
| 5.0V | 5V | red |
You can test that the device is working by running the program mifareread.py, as follows:
sudo python mifareread.py
and moving an NFC data tag into the field. This field should also trigger any NFC LED stickers you have, although no data is stored on them.
If you want an example of how the code written to the tags can be used to trigger tasks, then take a look at the examples mcpi_write.py and mcpi_read.py in the Adafruit library, and for further information there is a whole tutorial over at Adafruit showing you how to use NFC devices to control Minecraft - super-cool!
Search above to find more great tutorials and guides.